And please allow me, since it's been less than a month that the Beijing 2008 Olympic Games has ended, my demonstration example to resemble a 400 Meter Running Track... OK let's begin.
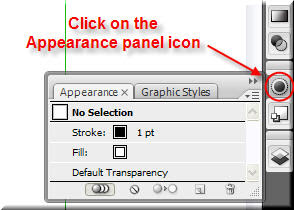
First of all, find the Appearance Panel Icon, click on it so that it expands, and drag it off the dock. We are going to use it quite often so let's place it somewhere so that we can quickly access it.
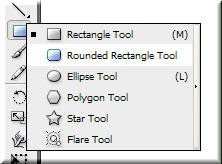
Select the Rounded Rectangle Tool from the toolbar on the left. Click and drag while pressing the up arrow key on the keyboard so that you draw a rectangle with fully rounded sides.
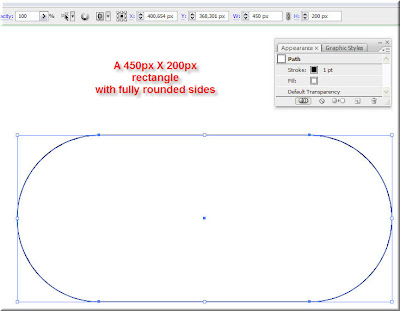
You should try and get an object similar to the following.
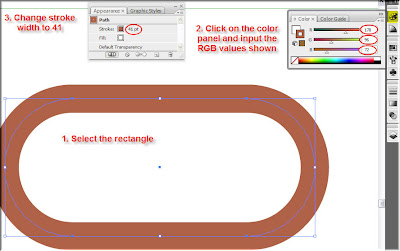
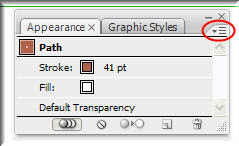
Select the shape, open the Color Panel and input the following values: Red 178, Green 96 and Blue 72. Then set a stroke of 41 points.
Ok... Now what we are going to do, is to create a second, narrower stroke on top of the first stroke we just created. Let me show you how. Select the shape and expand the Appearance Panel menu. Select Add New Stroke.
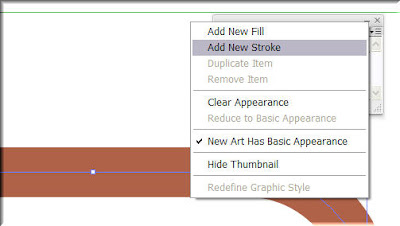
At first glance, you will not see any change since the newly created stroke is on top of the first one. Select the new stroke in the Appearance panel and change the color to white and reduce its width to 31 points. If you have followed along, you should end up with the shape shown below.
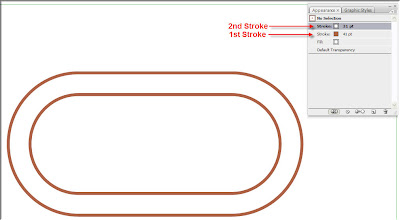
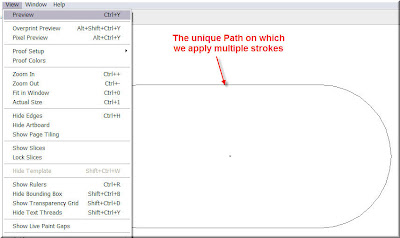
At this point you should keep in mind that the path remains ONE! Click on the View menu and select Outline (CTRL+Y). You can see the original path we drew, on which we apply multiple strokes.
Let's move on. Select the path and repeat the same procedure. Add a 3rd stroke of 29pt width and use the same light brown color we used before (R:178, G:96 B:72). You should now begin to understand where things are leading.
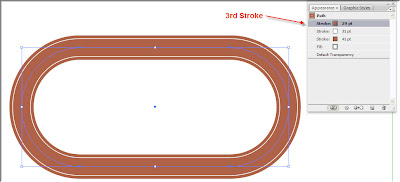
Important: First select the rectangle (path), and then select (in the Appearance panel) the stroke you created last. This way, the new stroke we are going add will be placed on top of the stacking order.
Repeat this procedure using the Stroke colors and Widths shown in the following image.
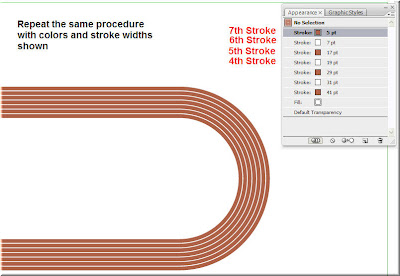
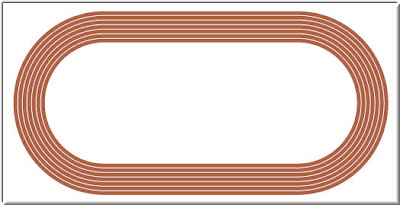
If you did everything correctly, you should have the following Illustration.
Note:
In this example, We applied several strokes (7) on a single path. If you now pick an anchor point with the direct selection tool, you may edit (move, delete etc.) that point and therefore change the overall shape in the usual way you would have done if you were dealing with a single stroke path (Have a look at my Selection Tools post. This way you can produce some very interesting and impressive shapes.
Following the same procedure also allows you to apply multiple fills to single paths. Select the track and change the fill to a light grass green.
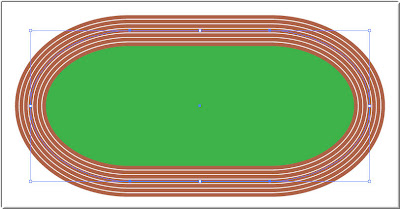
Select the path and select the fill in the Appearance Panel. On the menu select Add New Fill. Choose a grey gradient for the color and change the blend of that fill to multiply so that you get a draft impression of grass stripes.
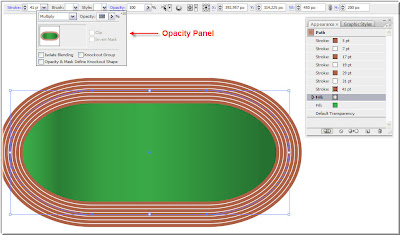
Finally, I will show you a very cool feature available in Illustrator. First delete the newly created fill (the grey gradient fill) and choose No Fill for the remaining one.
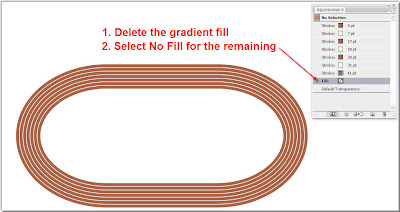
If you take a closer look at the Appearance panel, you will notice that there is a Graphic Styles panel hiden behind.
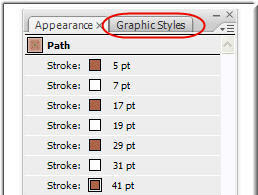
Activate it and ungroup it from the Appearance panel. Grab the tab from the title bar and drag it until you have the two panels side by side.
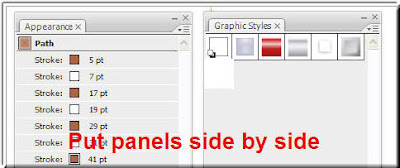
Now click on the little square in the Appearance panel and drag and drop it in the Graphic Styles panel.
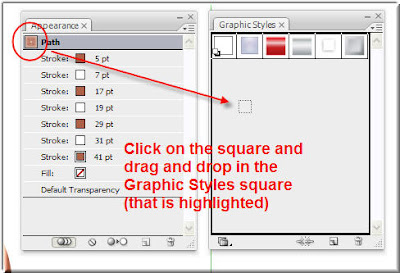
An identical little square was created in the Graphics panel. Double click on it and give it a name of your like. I named it track.
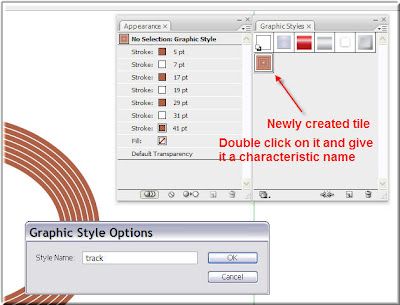
What you have actually done now is that you created your own graphic style. All the attributes we used for the track are now stored in this little tile.
What does this mean? I'll show you right away.
Draw a path with the Pen tool.
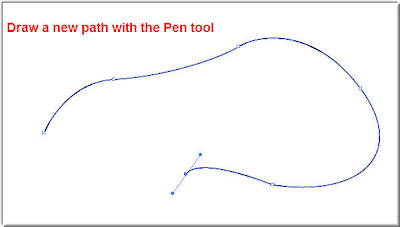
Select the path and click on the track tile shown in the Graphic Styles panel.
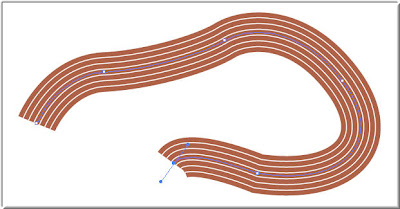
Attributes of the style we created before are applied to the path 'in a snap' and it may be available for future use. It saves you time, since you do not have to go through the procedure of adding all those strokes one by one, and helps you producing impressive designs.


0 comments :
Post a Comment